Chelia
- Author:
- Artem Sheludko
- License:
- MIT
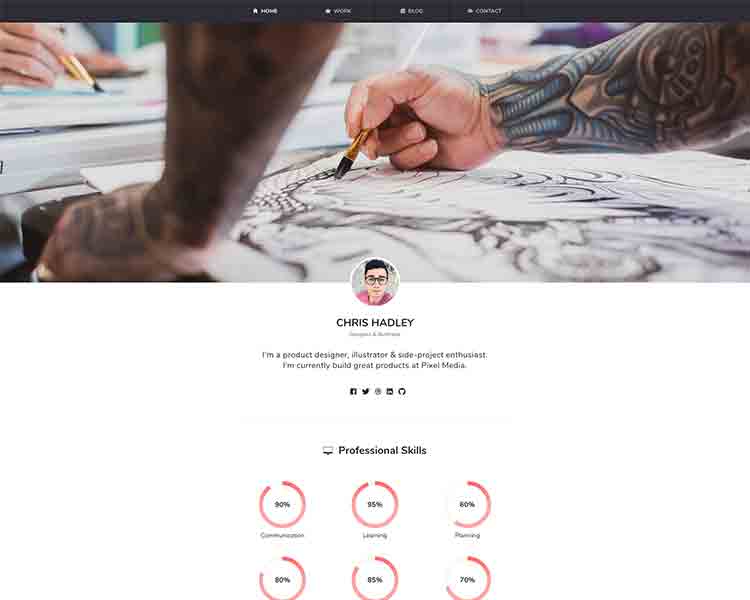
Chelia - Simple & Responsive Portfolio Theme for Jekyll
Chelia is a simple and responsive portfolio theme for Jekyll. Chelia includes lots of flexible settings, created to showcase your personal data (skills, experience, education, work, blog, etc). A careful approach to design and features make it an easy solution for a site portfolio.
Table of Contents
Features
- 100% responsive and clean theme
- Optimized for mobile devices
- Minimal design
- Valid HTML5 code
- Post sharing
- SASS files included
- Supports Disqus Comments
- Ionicons Icons
- Google Fonts
- Many More
Demo
Check the theme in action Demo

Deployment
To run the theme locally, navigate to the theme directory and run bundle install to install the dependencies, then run bundle exec jekyll serve to start the Jekyll server.
I would recommend checking the Deployment Methods page on Jekyll website.
Posts
To create a new post, you can create a new markdown file inside the _posts directory by following the recommended file structure.
  ---
  layout: post
  title: Last weekend with friends
  date: 2018-08-23 16:04:00 +0300
  image: 03.jpg
  ---
You can set the tags and the post image.
Add post images to /images/ directory.
For tags, try to not add space between two words, for example, Ruby on Rails, could be something like (ruby-on-rails, Ruby_on_Rails, or Ruby-on-Rails).
Work
To create a new work item.
- Add example image work to
/images/work/directory. -
Change the
name: andimage: value inprojects:projects:
- {name: Design Talks, image: ‘10.jpg’}
Disqus Comments
Chelia Theme comes with Disqus comments enabled.
Open _data/settings.yml file, and change the mr-brown value on line 26 with your Disqus account shortname.
  Comment Section (Disqus)
  disqus-identifier: mr-brown # Add your shortname for Disqus Comment. For example mr-brown
That’s all you need to setup Disqus from the theme side. If you get any issue regarding that comments are unable to load. First, make sure you have registered your website with Disqus (Step 1).
And also check Disqus troubleshooting guide if you still have issues.
Google Analytics
To integrate Google Analytics, open _data/settings.yml, and add your Google Analytics identifier.
# Google Analytics
google-analytics: # Add your identifier. For example UA-99631805-1
Update favicon
You can find the current favicon (favicon.ico) inside the theme root directory, just replace it with your new favicon.
Credits
I have used the following scripts, fonts or other files as listed.
- Google Fonts (Nunito, Sans Serif).
- Ionicons Icons
- FitVids.js
- Featherlight
- Easypiechart
- SmoothState
- StickyJs
- Slick Slider
- jQuery.com
- Preview Images form unsplash.com, pexels.com
License
Mit License
Support
If you want to show your appreciation, buy me one  Thank you for your support ❤️