Jekyller
- Author:
- Vadim Makeev
- License:
- MIT License
Jekyller 
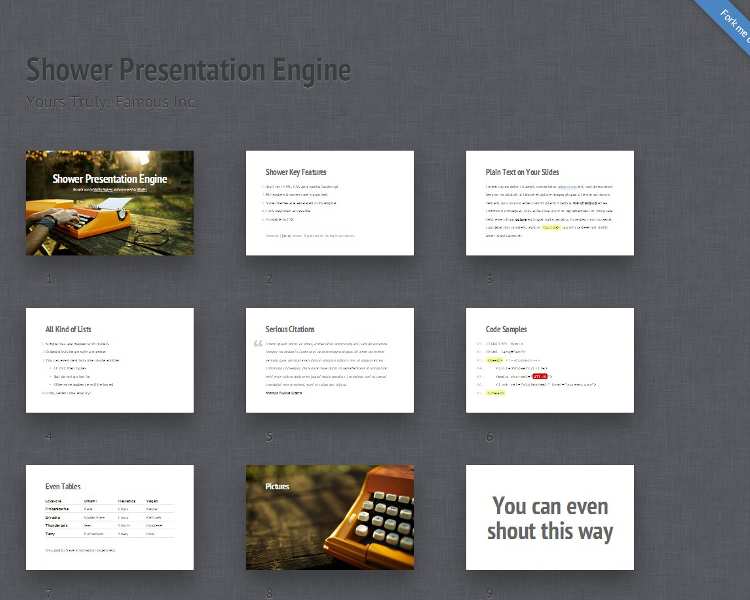
This is a generator for the Shower HTML presentation engine.
It takes your markdown document and transforms it into the Shower slides. Almost all the things are transformed smoothly, however there could be some things you could configure, either in the YAML front matter or using some extra special formatting.
Install
At GitHub Pages
Jekyll Shower works at GitHub Pages. Yes, it’s using Jekyll and don’t need any extra plugins, so using it is really staightforward:
- Fork this repo.
- Make any changes to it (like change your username and all those stuff in the
_config.yml). You can do it right on the GitHub, btw. - Commit & Push the changes — GitHub would initialise Pages only on the first push after the forking action. That could take up to 10 minutes.
That’s all — after doing so you could go at your generated pages — replace there the username with your username: http://username.github.com/jekyller/, and you’ll see Jekyll-generated example of the Shower presentation.
Local usage
If you’d like to preview the changes or compile it locally, so you’d have static HTML of your slides (and you could access them without an internet access), you should clone this repo (or a fork) locally:
git clone --recursive git://github.com/shower/jekyller.git
Note that you’ll need either to use the --recursive flag, ‘cause there are submodules to fetch, or you’ll need to use git submodule init && git submodule update in order to fetch them manually if you didn’t use this flag.
After cloning all you’ll need to do is to run Jekyll in the cloned folder. On how to install and run Jekyll read it’s readme.
Use
The basic usage is very simple. After you’ll configure everything up in the _config.yml (I recommend you do so: you should at least change the default author entry), you could begin making your slides.
Look at the index.md for an example of how you can describe your slides. Your markdown document should need the YAML front matter like this:
---
layout: default
---
That’s the minimal front-matter you need. You could configure it later.
Note that you don’t need to place your title here — Jekyller would get it from the first H1 found in your markdown document (actually, at the moment, you need to have the first-level header to go right after the YAML front matter).
So, you just write
# You slides’ title
And get this as a title for your slides as well as make this slide a cover for the whole presentation.
If you won’t want to make this slide a cover, but a generic slide, just add a .slide class (however, I think you’d rarely would want this — covers are nice!):
# You slides’ title
{:.slide}
Everything else goes smoothly: use second level headers to divide the content into the slides and all the other tags inside to make your presentation.
I’ll describe there all the things you could do in your presentation, as well as all the available options later in this Readme, so stay tuned!
Configure
Change theme
By default Jekyller comes with the ribbon theme applied to all new slides. If you wish to change the default theme, change the default_theme variable in config.
Right now only two themes are available: ribbon and bright.
Themes are attached as submodules, so if you’d like to add your own great theme for Shower so anyone could use it with Jekyller, just send a pull request with it! However, don’t forget that it should be attached via git read-only url — git:// — in order to work under GitHub Pages.
And if you’d like to change theme per presentation, just define theme variable in YAML front matter or refefine the layout one with the one you want to use, so to use bright theme your minimal front matter would look like this:
---
layout: bright
---
Author info
I know you’d like to change the default placeholdered author info for your slides. This is also is manageble through config, look at the author object there. It have multiple sub-properties like name, url for your blog/twitter/etc. and a field for your company. Change it!
And, of course, you could change those thing per presentation in YAML front matter. And while the syntax in config is rather strict, in YAML you could use a lot of variants, like not using the url or company, so this would be ok:
---
layout: default
author: John Smith
---
Language
There is a default_lang variable in config, it’s defaulted to en, but there is also ru supported for Russian. It don’t do much, for now it changes the style of list markers and quotes.
Of course, it’s available to redefine per-presentation in YAML front matter as a lang variable.
Body class
By default Shower page opens in list mode, but if you’d like to open in fullscreen mode from the start (to avoid spoilers, for example), you can change the class on body to full either redefining the default_body_class: full in config, either using body_class: full in YAML front matter.
Progress bar
If you’d like to disable the progress bar, just set the progress (in config or in YAML front matter) to false.
More configuration option coming
Stay tuned or propose your options in Issues!
Features
GitHub Pages support
See install notes on how you can use Shower with Jekyller in just a few easy steps.
Minimalist markdown
The title of the slides
As mentioned above in the use section, the only thing that need be there other than YAML front matter is a title made of a markdown first level header:
# Some slides
That’s it, nothing more!
Slides
Every other slide should start from the second level header, just like this:
## I'm a slide!
You don’t need to recreate or think on Shower’s HTML structure, you just delimit the slides using headers, easy as this.
id for the slide
By default the slide would take an id from it’s content, almost like in GitHub-flavored markdown. But if you want to override it, you could use the syntax kramdown (which is used for Jekyller) provides, like this:
## I'm a slide! {#Foo}
In this way the slide would have id="Foo" instead.
Shouting
If you’d like to shout (use the shout class on a slide), you could just wrap the content of a header with strong:
## **You can even shout this way**
This would make such slide a shout one.
Extra classes or attributes
Another way to add stuff to a slide is to use a more general syntax ({:…}) from kramdown for adding different attributes.
Just add any of them to the header and they would propagate to the slide. Like this:
## Pictures
{:.cover #Picture}
or
{:.shout data-timing="00:03"}
## You can even shout this way
In the first example you can see how we make a “cover” from a slide adding .cover class, and also when you’re using this syntax you need to move id reference inside it, so you can’t use the on-line one above with adding other attributes.
In the second example you can see another variant of the attributes block usage — you can place it either after or before the heading, it doesn’t matter to kramdown, so use it as you like. In this second example you can see how you can set any custom attributes from there.
Covers with images
If you’d like to have a cover without header, just use an image inside a header like this:
## 
{:.cover}
Also, Shower engine allows you to say if the image should be fit to the width or height using the classes of .w for width and .h for height. Like this:
## 
{:.cover .h}
Tables
As Jekyller is using kramdown engine, you can use the kramdown syntax for tables.
Briefly, you can use them like that::
|  Locavore      | Umami       | Helvetica | Vegan     |
+----------------|-------------|-----------|-----------+
|* Fingerstache *| Kale        | Chips     | Keytar    |
|* Sriracha     *| Gluten-free | Ennui     | Keffiyeh  |
|* Thundercats  *| Jean        | Shorts    | Biodiesel |
|* Terry        *| Richardson  | Swag      | Blog      |
You can see a little difference from the kramdown syntax: there is now a way to make ths with row scope: just start and end the cell with asterisks:
|* Fingerstache *|
Code with line numbers
By default Jekyller would add line numbers to your code blocks. If you’d like to disable this, add line_numbers: false to your YAML front matter or toggle the global variable in the _config.yml.
Presenter notes
In Shower the presenter notes are made by using <footer> tag. Jekyller provides you a convenient way to write short ones — just write them like this:
// I'm a presenter note!
That’s it — a line starting with // followed by one optional space would be wrapped by <footer>.
However, if you’d want more complex note, you’d need to use plain html <footer>, ‘cause there is no way to place anything block-level inside this “comment” right now.
Embedded HTML
Of course even extended by kramdown markdown syntax don’t have everything in it. So if you’d like to add something extra, you could just use plain HTML there. Like this:
<figure markdown="1">

> Lorem ipsum dolor sit amet, consectetur adipisicing elit, sed do
eiusmod tempor incididunt ut labore et dolore magna aliqua. Ut enim ad
minim veniam, quis nostrud exercitation ullamco laboris nisi ut aliquip
ex ea commodo consequat. Duis aute irure dolor in reprehenderit in
voluptate velit esse cillum dolore eu fugiat nulla pariatur. Excepteur
sint occaecat cupidatat non proident, sunt in culpa qui officia.

<figcaption>Marcus Tullius Cicero</figcaption>
</figure>
Also, kramdown is somewhat smart about the html, so when you open a tag it won’t treat anything inside as markdown. You can change this by using kramdown-specific attribute markdown="1", so everything inside would be rendered as markdown.
Attributes blocks
As mentioned in the part on extra classes for slides, kramdown adds a way to add any attributes to markdown tags. For block-level entities add {:…} at the line above or beyond the block, for inline blocks use it at the start of its content, so for marking list items to have inner navigation you can use this:
1. Lets you reveal list items one by one
2. {:.next}To keep some key points
3. {:.next}In secret from audience
4. {:.next}But it will work only once
5. {:.next}Nobody wants to see the same joke twice
Shortcut for .next list items
As you can see above, the syntax for making .next to list items is not that convenient. That’s why we added a way to write it easy and fast: use three dots (or an ellipsis symbol) at the beginning of a list item (optionally followed by a space character) and you’d get this class automatically:
1. Lets you reveal list items one by one
2. …To keep some key points
3. …In secret from audience
4. …But it will work only once
5. …Nobody wants to see the same joke twice
See, it’s so much better and readable now. And as we already mentioned, there are few ways you could write those ellipsis, choose any style you like, they’re equal:
1. Lets you reveal list items one by one
2. ...To keep some key points
3. ... In secret from audience
4. …But it will work only once
5. … Nobody wants to see the same joke twice
And if you’d like to use an actual ellpsis and not to have it transformed to .next, just escape it like this: \… (or ... if you’re using plain dots).
A lot more coming soon!
Some of those examples would be made easier in the feature — we’re planning on extending the markdown syntax with shower-specific things, so you could easier mark shouts, <mark> inside code blocks and other stuff. Stay tuned!
Organize your presentations
With Jekyller you can have all your presentations in one place: just create a new .md file in the project, add a proper YAML front matter as mentioned above and start writing you slides!
Credits and License
This is just a generator for the awesome Shower engine by pepelsbey and other nice people.
All the themes are attached as submodules, and all the rights for them are belong to their authors.
Jekyll Shower licensed under MIT License, see license page for details.